Showing posts with label Decorating. Show all posts

Thursday, November 13, 2014

Mini-Mantle Makeover + Front Closet Fun

You might remember my recent mantle makeover HERE.  Once Halloween had pasted I wanted something a little more Autumn feeling and did a quick switch up.


I moved a few things around and took off a few things.  I found the silver frame on the left at Goodwill for $2.99... it was brown and hideous so I spray painted it silver.  I eventually want to put the glass back in it with a photo or a piece of art but until then it's framing the vase and flowers I stole from my dining room table.   
The picture frame on the far right was one I just had laying around, so I found a free printable that is a countdown to Thanksgiving and has a place to write what we are thankful for each day.  My kids have loved this!  They enjoy taking turns choosing what we will be thankful for each day and it's nice to see what they come up with.  We just write on the glass with a expo marker... think I'll be saving this for next year.  

Yesterday, I randomly decided I was going to make over the front coat closet.  It's a place that never gets much attention and always seems to be a mess.  I recently found a small shelf at Goodwill for $2.99... seriously I think I'm addicted to Goodwill shopping I've been to 4 different ones this week!  Anyway, I found this shelf that I wanted to use for the shoes and then I picked up a cute hook rack thingy to put up for the kids to hang their coats on.  Because honestly what 3 year old actually hangs their jacket back up on the hanger?  So before I hung that up I wanted to paint the closet.  The final product was great and it was nice to start and finish a project in one day.  
I decided on a dark color because the wall was covered in black scuff marks from the kids throwing their shoes in the closet, and because I had a whole gallon from a previous project ;) .  I added the stripes for some color, that happened to perfectly match the color I spray painted the hook rack.  

Here is the BEFORE: 


And the AFTER: 

The rack is tucked inside and is a perfect height for the kids to hang their jackets. 

I didn't plan on a makeover on the shoe shelf, but after painting I realized I wasn't gonna be happy with the plain wood.  I ended up spray painting the edges and sides of the shelf.  On the shelf I Modge Podged on some fabric I dug out of my basement.  I like how it adds a pop of bright color.

Overall I'm really happy with the changes... and thinking I might have to give the upper half some love down the road.  

Monday, September 29, 2014

Fall Decorating on the Cheap

I love the idea of holiday decorating but I hate the idea of spending money on something that is only going to be up for one season.  After a few too many hours on Pinterest I was dying to make something festive happen.
I decided the mantle would be the perfect place to start, this is what I started with. (pretty much... I had replaced the "C" with a new one, and added the candle sticks)

I started with the garland.  I've seen so many fun tutorials on making these and I wanted to give it a try.  I started by searching the house for any scrap fabric or felt.  I ended up using felt to hot glue the candy corn triangles together.  I kept the triangles uniform my making a paper pattern to cut out all the flags with.  The black triangles were also felt and the polka dot fabric was from an old curtain.  To connect them all together I ripped a piece of scrap grey fabric about 1.5" wide, then glued down all the triangles on the bottom half of the strip.  After they were all glued on I went back and folded and glued down the fabric.  It was fast and simple and I didn't have to get out my sewing machine :)

I wanted to stick with a black, white, with hints of color scheme.   I stole the tree picture from my bedroom and pulled my other black and white canvas out of a closet.  Then I headed outside to gather some branches.  I just snuck those into the empty white frame and taped them down on the back inside of the frame.  I printed out a crow silhouette and laid it on some black felt to cut out.  Then taped it to the branch and a little tape on back to the glass on the frame.  The branches really added a nice touch of dimension that I liked a lot.  Not too bad for FREE. 


After feeling successful on the mantle I decided to spice up my dining room table.  This is a room we don't use very often but I have to walk by it all the time.  With 4 kids running around decorating has to be strategic... well, unless you like cleaning up glass.  I decided to try something that I normally wouldn't do in a more high traffic area in my home.  
I used a curtain that I folded under to make the table runner.  For the "tree trunks" I wrapped a few vases and a straw dispenser with some white paper and then used a black marker to make it look like an Aspen tree.  Then, back outside for some more branches.  The flowers were left over from a wreath I made so I thought they might add some nice color.  


Total cost for this... $3 if you count the flowers that were used for a different project.  


Saturday, November 17, 2012

Late Night / Nap Time Crafts

I don't know what got into me yesterday but once the kids were in bed I went to work on some fun crafts and the next thing you know I'm up until 2 am.  

I made this letter? letter wreath? monogram? Not sure what to call it... that "W" thingy. 
I made this for a craft exchange that I'm doing.  It will end up somewhere in Texas with a nice lady named Summer W. 

Then onto my Winter wreath.  I bought the wreath a few weeks back at a yard sale for only $0.50, I've been wanting to decorate it ever since I got it.  So I braved Michael's with my four children on Friday and somehow was able to walk out with some super cute flowers and snowflakes which were all 50-60% off yay!  I wrapped it in some fabric from an old curtain. Then started hot glueing like crazy.
When I was done I was so excited I wanted to hang it up.  I got the hook up and then tried to hang it... I ended up dropping it about 4 times before I actually got it on the hook.  Needless to say there is a nice dusting of glitter on my floor ; ) 

 After my night of crafting I just couldn't stop so today I pulled out a blank canvas and made myself a Christmasy painting.  I think I have officially fulfilled my creativity itch for the month.

Friday, July 20, 2012

Super Hero Surprise Party!!

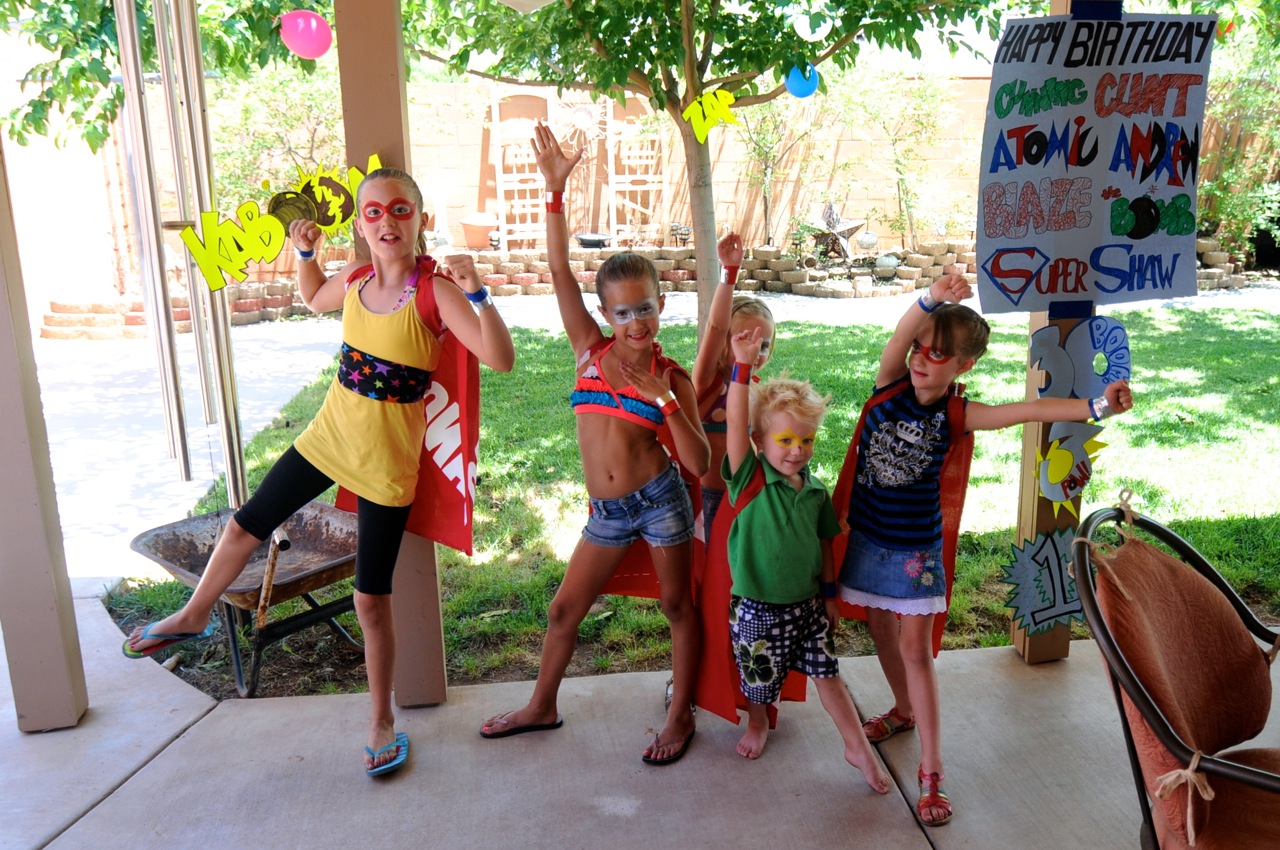
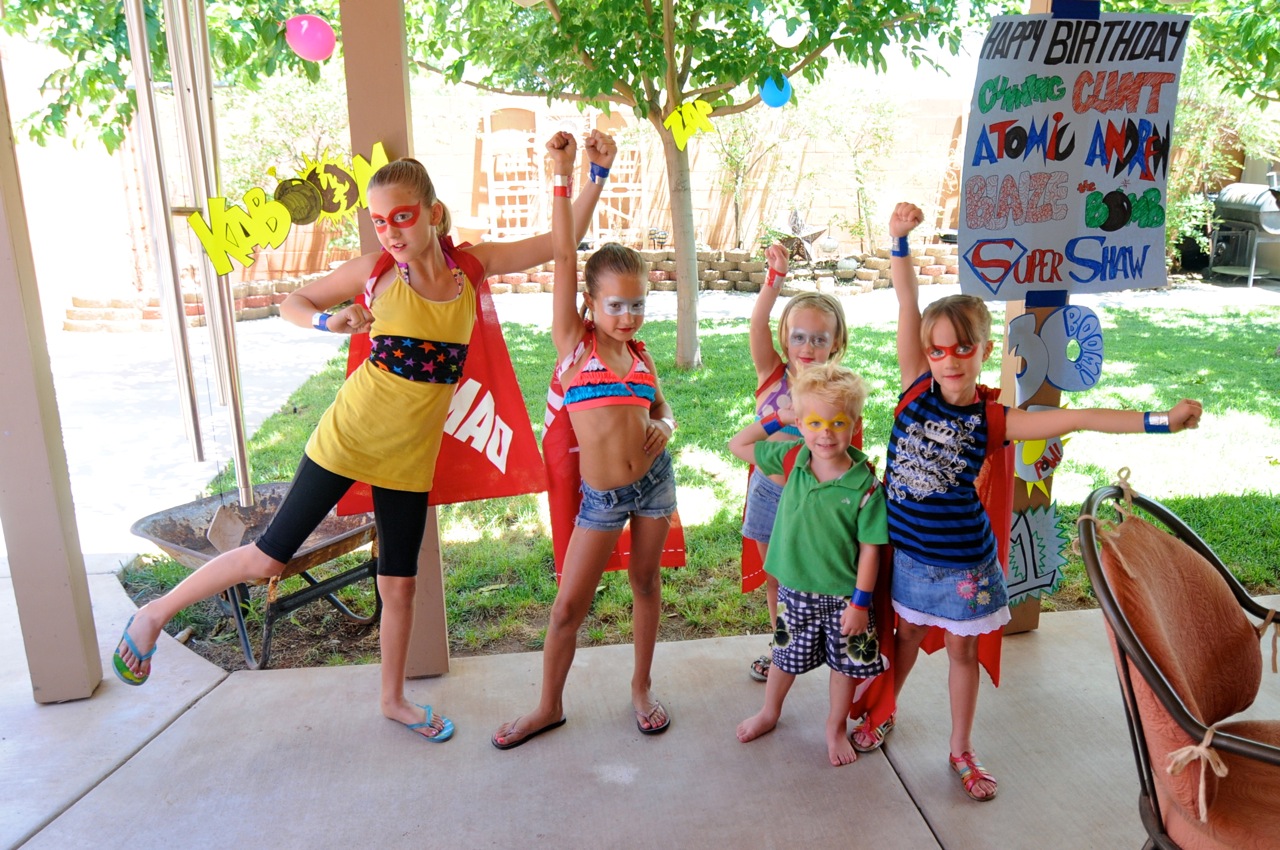
We had this great idea to cover 4 birthdays in the family with one awesome Super Hero Surprise party. It was a success and soo much fun! 
On the right you will see the list of birthday boys... 
Cunning Clint! 
Atomic Andrew! 
Blaize the Bomb! 
& Super Shaw!
Yeah that's right cheesy and ridiculous but FUN! FUN! FUN!
Other decorations included cool super hero words/sounds.  Like Kaboom! Skadoosh! Pow! You get the idea.  We made them out of some inexpensive poster board and some markers.  


Shaw couldn't help but fly away with his cape on : ) 


Yup we were taking pictures of ourselves while we were waiting for Cunning Clint and Atomic Andrew to arrive for the surprise.


The dress code was pretty simple... stick to some primary super hero colors.  Blue, Red, White, Yellow,  and Green.  We made these awesome wristbands with duct tape.
*Shaw wore his wrist bands for 3 days after this... he just couldn't get enough!*


We painted on "masks" with some inexpensive acrylic craft paint.  Directly around our eyes we used some metallic silver eyeshadow and it blended perfectly with the metallic silver paint.


"SUPER HEROOOOOOOOOSSSSS!!!"


 For the capes we found this fabric at Wal-Mart for only $1.50?! a unit.  There were 2 "dangers" per unit so 6 capes only cost us $4.50!  We gathered the top of the cape and pinned it onto some scrap pieces of fabric that we cut for the ties.  Then we just did a straight stitch across the gathered area.  These were so quick and easy and I'm sure you could even hot glue them if you didn't want to pull out the sewing machine.  


The entire super hero posse!


Sisters are great... if you don't have one you should get one. 
Now, I will be honest we only wore these boots for the pictures then we put our flip flops on... it was almost 100 degrees and that weather is not made for boots : ) 
*a super power was used on this photo* 

Now onto the funnest part of the party... we did a Super Hero Slip and Slide!!! 
A large sheet of black plastic + some dish soap + water = AWESOMENESS  
This one deserves a video so enjoy!


We also did some interviews with our Super Heros.

For those of you with iMovie I used the "Cartoon" effect on this video.  I think it really give it a fun comic book kind of feel.  : ) 

Saturday, January 21, 2012

Cork Board Project

I found this great 30"x 42" cork board on Craigslist for $10, it had never been used and it was in perfect condition.  
 I almost forgot the before picture, but here is what it looked like before.  I think cork is very boring so I thought I'd spice it up.  

 I did the back round color in a flat finish, and the design was metallic of the same color.  I drew out a template for the design I wanted and cut it out.  I would just lay the template out and paint about an inch around it, so the template wasn't getting covered in paint, I also didn't want the pattern to be perfect so I wasn't super concerned with following the pattern exactly.  

I am not a naturally organized person, so it has been my goal since becoming a wife and mother of four to learn some organizing skills.  I found this great website called iHeart Organizing and printed out some great free printables that will help me keep track to appointments during the week, meal plans and a few other things. 

My fabulous cork board is now hung in my kitchen and ready to keep me on track.